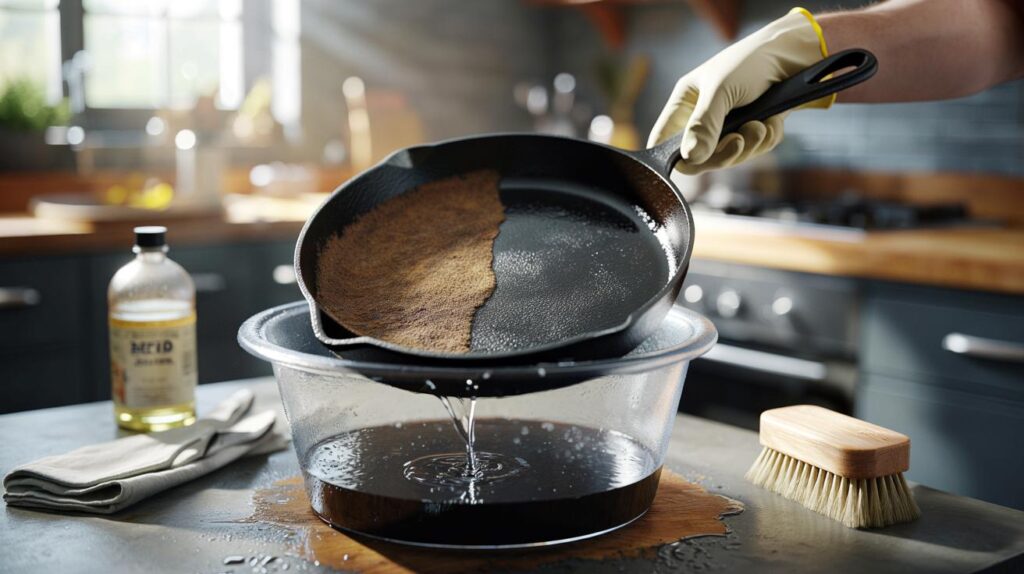
The pan looked fine from far away. Heavy, dark, solid – the kind of cast iron skillet your grandmother would nod at approvingly. But under the kitchen light, the truth showed up: patchy brown stains, rough, rusty edges, food sticking in random places like it was glued on. You scrubbed, you salted, you heated and oiled. It still felt tired.
At some point you start wondering if the shiny black pans on Instagram are even real.
There’s a quiet moment when you’re holding that pan, thinking, “Maybe this one’s done.”

And yet, there’s a forgotten soak that brings cast iron back from the dead.
The hidden enemy on your pan isn’t dirt, it’s chemistry
Most people blame themselves when their cast iron looks terrible. They think they didn’t season enough, didn’t scrub hard enough, didn’t baby it correctly. So they double down on the same routine: hot water, stiff brush, salt, dry on the stove, oil, oven.
Sometimes that works. But sometimes the surface still feels like sandpaper.
What’s really happening is quieter and more boring than any cleaning hack: old polymerized oil has turned sticky, half-burned and uneven. The glossy black coat that should protect the metal has broken into islands. Underneath, raw iron is reacting with water and oxygen. Rust blooms. The pan loses that soft, glassy glide.
Ask around and you’ll hear the same story.
A reader wrote to me about her 30-year-old skillet that used to fry eggs like a dream. Over time, she switched from gas to induction, then to an electric stove in a rental. Heat control got sloppy. The pan developed a reddish shadow, then a matte brown circle right where food sat in the center.
She tried everything TikTok suggested: potato and salt scrub, baking-soda paste, super high-heat reseasoning “until it smokes like crazy.” The result? A pan that looked black at the edges but grabbed onto fried potatoes like Velcro. One night, scraping off a stuck omelet, she admitted she almost tossed it in the bin.
The problem wasn’t that her pan was “ruined”. It was layered.
Old seasoning, smoke, spilled oil and microscopic rust had fused into a stubborn crust. Every new layer of oil she baked on just sat over the mess, like painting over peeling walls. The surface could never go fully smooth or fully nonstick again.
That’s where the forgotten soak comes in. Not as a miracle shortcut, but as a reset button. Behind the clickbait name is a very simple idea: let a mild bath do the slow work that steel wool and elbow grease can’t do evenly.
The forgotten soak: a slow bath that strips, smooths and resets
The soak itself is almost disappointingly simple: a long, gentle bath in a water-and-lye solution.
Pros call it a lye bath. Backyard tinkerers sometimes call it the “strip tank”. It’s a method that quietly lived in old forums and restoration workshops while the rest of us were fighting with sponges. Lye – sodium hydroxide – doesn’t care about your feelings. It softens and dissolves old cooked-on oils, sticky seasoning, and stubborn gunk clinging to every curve of the pan.
After a couple of days in this solution, a pan comes out ghostly, dull, almost gray. The old personality is gone. What you’re holding is basically bare metal, ready for a new story.
Picture this: a flea market pan for five dollars.
Handles black with grime, cooking surface streaked orange with rust, weird smell when you heat it. The kind of pan you buy with optimism and then regret when you realize how bad it really is. Most people attack it with a wire brush, then give up around the handle and the underside. There’s always one area that never looks clean.
Now imagine lowering that same pan into a plastic bin filled with warm water and a controlled scoop of pure lye crystals. Lid on. Left alone in the garage for 48–72 hours. When you lift it out, wearing gloves, the crust literally wipes off with a scrub pad. No frantic scraping, no sparks from angle grinders. Just soft, defeated grime sliding away like wet chalk.
There’s a logic to this that feels oddly calming.
The lye only targets organic residues: old oil, baked-on food, carbonized seasoning. It doesn’t eat the metal itself. As the layers soften and fall, you finally see what shape the iron is actually in. Tiny pits, yes. Maybe some deeper rust spots at the edges. But also a clean, honest surface that can finally bond with fresh seasoning.
*This is the part we skip when we rush from “dirty pan” straight to “more oil, more heat, more seasoning.”*
The forgotten soak is really just a way of saying: stop fighting on the surface. Clear the stage. Start again on clean iron.
How to safely use the soak without wrecking your kitchen or your nerves
Here’s the core method, the one restorers quietly rely on.
You need a sturdy plastic bin big enough for your pan, cold or lukewarm water, and pure sodium hydroxide (drain cleaner in crystal form, with no dyes or additives). Outdoors or in a very well-ventilated space, you slowly sprinkle the lye into the water – never the other way around – until you reach about a 4–6% solution. Then, wearing gloves and eye protection, you gently slide the pan in and walk away.
Over one to three days, the bath breaks down the old crud. Every 24 hours, you check, pull the pan out, scrub with a nylon brush, then dunk it back if needed. When it’s clean, you rinse it thoroughly, neutralize any remaining lye with a quick vinegar splash, rinse again, and immediately dry and oil to keep rust from flashing in.
If you’re already feeling a bit tense reading this, that’s fair. Lye sounds scary because, in the wrong hands, it is.
The trick is to approach it like you would bleach or oven cleaner: with calm respect, not panic. Gloves on, goggles on, kids and pets away, no rushing. Don’t mix lye with other chemicals. Don’t lean over the bin to inhale steam. Just measure, stir, and back off.
And here’s a plain-truth sentence: nobody really does this every single day.
This is a once-in-a-while reset for pans that feel beyond help, not a weekly ritual. Most of your cast iron life will still be soap, hot water, quick dry, thin oil. The soak is like sending your skillet to rehab when everyday habits aren’t enough.
The emotional part isn’t the chemistry. It’s the relief of realizing that your “ruined” pan can actually start over.
“Watching that first egg slide across a pan I almost threw away felt ridiculous,” one home cook told me. “It was like getting an old friend back after thinking they’d moved away for good.”
After the lye bath, the steps are simple: dry the bare pan well, remove any light rust with steel wool or a scrubby, then season in thin, patient layers. Not puddles of oil, just a whisper on a warm surface, wiped until it almost disappears, baked at high heat for an hour, cooled, and repeated.
- Step 1 – StripSoak in a controlled lye bath to melt away old seasoning and baked-on grease.
- Step 2 – RevealScrub, rinse, and lightly de-rust until you see clean, raw iron.
- Step 3 – RebuildApply very thin layers of oil, bake them on, and slowly rebuild that smooth black finish.
- Step 4 – MaintainGentle cleaning, quick drying, light re-oiling after use keeps the new finish stable.
- Step 5 – Repeat only when neededYou might not do this again for years, if ever.
From shame-pan to showpiece: what changes when you know the reset exists
There’s a strange kind of shame around damaged cast iron. People hide flaking pans in the back of cupboards, apologise when guests see rust, tell themselves they “don’t deserve nice cookware” because they let it go. That’s a lot of weight for a piece of metal.
Once you know a forgotten soak can strip a pan almost back to factory bare, that shame softens. You stop treating every little scratch like the end of the world. A burned sauce, a night soaking in the sink, a month abandoned in a damp cupboard – none of that has to be permanent. The lye bath is your “control Z”.
You might even walk past the junk table at a yard sale and feel a little thrill instead of disgust.
| Key point | Detail | Value for the reader |
|---|---|---|
| Deep reset is possible | Lye soak removes old seasoning, grease and carbon without grinding the metal | Transforms “ruined” pans into smooth, re-seasonable surfaces |
| Safety and patience matter | Protective gear, correct mixing order, and slow soaking over days | Lets anyone use the method at home with confidence, not fear |
| New habits keep the finish | Thin oil layers, gentle cleaning, quick drying after each use | Helps the pan stay black and nonstick so the reset lasts for years |
FAQ:
- Question 1Isn’t lye too dangerous to use at home for cleaning cast iron?
- Answer 1Used carelessly, yes. Used with gloves, eye protection, a plastic bin, and simple rules (add lye to water, not water to lye; no mixing with other chemicals), it’s about as manageable as working with oven cleaner or strong drain opener. Many vintage-restoration hobbyists do it in their garage or backyard.
- Question 2Will a lye bath damage or thin the cast iron itself?
- Answer 2No. Lye attacks organic material – oils, fats, food residues – not the iron. What can damage iron is long, unprotected exposure to water and oxygen, which is why you rinse, neutralize, dry and re-season soon after the soak.
- Question 3Can I just use oven cleaner spray instead of making a lye bath?
- Answer 3Some people do use heavy-duty oven cleaner (which also contains lye) in plastic bags around a pan, but it’s messier, smellier and less even. A controlled lye bath gives full coverage and is usually cheaper once you’re restoring more than one piece.
- Question 4What oil should I use to re-season after the soak?
- Answer 4Neutral, high-smoke-point oils like grapeseed, canola, sunflower or refined avocado oil all work. The key isn’t the brand; it’s using a very thin layer, wiping off excess, and giving it enough heat time to polymerize into a hard, black coating.
- Question 5How do I know when my pan needs a full soak versus just a quick scrub and re-season?
- Answer 5If you see isolated rust spots, mild sticking, or dull patches, you can usually fix that with a scrub, spot de-rusting, and a couple of seasoning rounds. If the entire cooking surface is patchy, sticky, flaking, or covered in thick, glossy buildup that never behaves, that’s when the deep soak earns its keep.