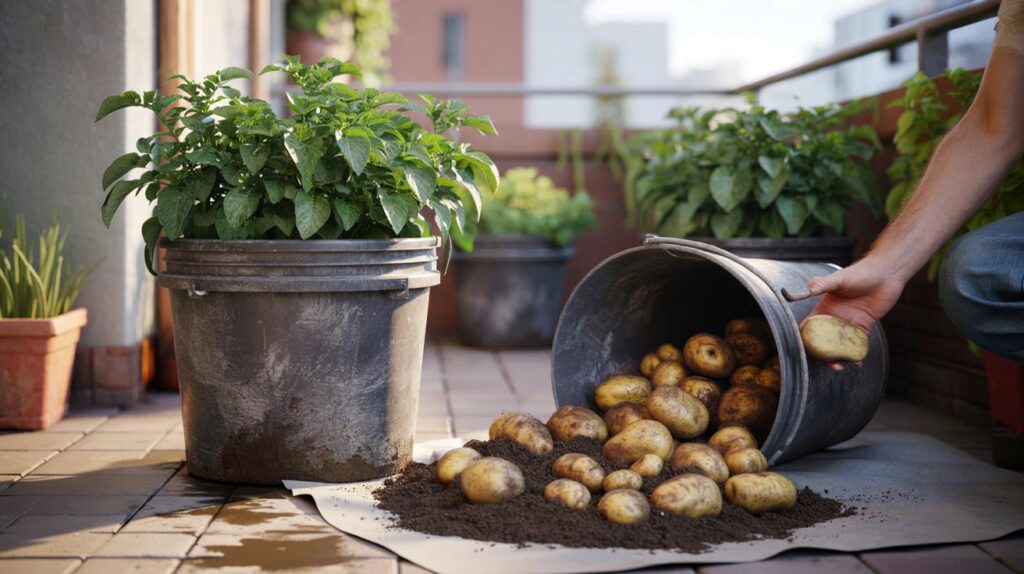
Across city blocks and small suburban plots, people are trading lawn space and allotment queues for buckets filled with soil and seed potatoes, chasing the simple pleasure of tipping out a container and watching fresh tubers roll across the ground.
Why people are growing potatoes in buckets
Container gardening has surged in recent years, and potatoes in buckets sit right at the heart of that trend. The method turns cramped spaces into functional mini-plots and gives growers far more control than they would have in open ground.
Growing potatoes in buckets cuts down on soil problems, simplifies care and fits neatly into modern, space-starved homes.

In traditional beds, soil compaction, poor drainage and awkward access often limit yields. Buckets, by contrast, keep the root zone loose, airy and well drained. They can be shifted around a courtyard or balcony to catch better light or shelter from intense heat.
Another strong draw is hygiene and organisation. Buckets make it easier to rotate crops, refresh or sterilise the growing mix and keep mud, weeds and debris under control in tight urban corners. For many first-time growers, the set-up feels far less daunting than breaking ground with a spade.
Choosing and preparing the right bucket
The container itself does much of the heavy lifting. A bucket that is too small or badly drained can stunt plants and rot tubers. Most growers settle on containers between 20 and 30 litres, which give enough depth for root growth and multiple layers of potatoes.
A useful rule: if you would not store washing-up water in it, do not grow food in it. Go for food-safe, sturdy plastic or a clean metal pail.
Basic preparation steps
- Drill several holes in the base and, if possible, around the lower sides for drainage.
- Add a 3–5 cm layer of coarse material such as gravel, broken tiles or expanded clay.
- Fill with a light, fertile mix rather than heavy garden soil.
The growing medium needs to stay loose and well aerated. Garden centres sell ready-made potting composts, but many home growers mix their own. A typical recipe blends topsoil or garden loam with mature compost and a small portion of coarse sand to keep the structure open.
Organic matter does more than feed the plant. It helps the bucket retain just enough moisture between waterings while allowing excess to drain away, which is vital for avoiding soggy conditions that encourage rot.
From sprouting spud to planted bucket
At the heart of this method lies the seed potato. Specialist seed tubers give predictable results and good disease resistance, though many people start with firm, supermarket potatoes that have begun to sprout naturally in the kitchen.
| Stage | What to do | Practical tip |
|---|---|---|
| Selection | Choose firm potatoes showing short, healthy shoots. | Avoid any with mould, soft patches or strong odours. |
| Cutting | Slice larger tubers into chunks, each with at least one sprout. | Let cut pieces dry for a few hours so the surface seals slightly. |
| First layer | Place 10–15 cm of prepared compost in the base of the bucket. | Do not compact the layer; keep it fluffy. |
| Positioning | Lay the seed pieces on the compost with sprouts pointing upwards. | Leave a hand’s width between pieces so tubers have space. |
| Covering | Sprinkle 5–10 cm of compost over the potatoes. | Resist the urge to fill the bucket to the top at this stage. |
| First watering | Water until the mix is evenly moist, not dripping. | Standing water under the bucket signals poor drainage. |
That shallow covering protects the sprouting tubers while allowing stems to push through quickly towards the light. Within a couple of weeks in warm conditions, leafy shoots should appear at the surface.
How “hilling up” inside the bucket boosts yield
One of the tricks behind generous bucket harvests is repeated “hilling up”, or mounding soil around the growing stems. Once the shoots reach 15–20 cm in height, growers gently add more compost around them, covering much of the stem but leaving the top leaves exposed.
Each round of fresh compost along the stem creates more potential points for tuber formation at different heights in the bucket.
This gradual fill serves two purposes. It encourages the plant to produce potatoes along the buried stems, and it shields forming tubers from light. If potatoes sit too near the surface and sunlight reaches them, they turn green and develop solanine, a bitter compound that makes them unfit to eat.
The mounding process can be repeated several times until the bucket is almost full. The compost should be added loosely rather than pressed down. Compacting the mix makes it harder for fine roots to spread and increases the risk of waterlogging.

Light, water and feeding until harvest
Potatoes grown in containers like bright conditions. A few hours of direct sun each day usually gives strong, leafy growth and better yields. Buckets placed in deep shade tend to produce tall, weak plants and fewer tubers, so some creative shuffling may be needed on a balcony.
Watering calls for a steady hand. The goal is a consistently moist, but not saturated, mix. Long dry spells stress the plant and can lead to small or misshapen tubers, while soaked compost suffocates roots and promotes rot.
Check moisture with a finger test: if the top few centimetres feel dry, it is time for a thorough drink.
Feeding makes a noticeable difference in confined containers. A fertiliser richer in potassium and phosphorus than in nitrogen tends to favour root and tuber development. Too much nitrogen pushes lush foliage at the expense of the crop beneath the surface.
Good ventilation around the foliage helps prevent fungal problems and keeps common pests such as aphids and potato beetles from building up. Because each plant sits in its own bucket, any issue that does appear can usually be contained before it spreads across an entire patio garden.
Knowing when the bucket is ready to tip
Patience pays off in the last stage of the cycle. Most varieties grown in buckets reach maturity somewhere between 90 and 120 days after planting, though cool weather or very short daylight can extend that window.
The plant itself signals when it is nearly done. Leaves begin to yellow and crisp at the edges before the stems flop over and dry out. At that point, many growers reduce watering for ten to fourteen days. This pause helps the potato skins toughen slightly, so they store better and bruise less during handling.
Harvesting is surprisingly straightforward. The bucket is tipped gently onto a clean sheet or tarpaulin. The grower then breaks up the compost by hand, picking through for tubers of all sizes. Large potatoes head straight to the kitchen; smaller ones can be set aside as next season’s seed for another round of bucket planting.
Risks, rewards and realistic expectations
Yield from a single bucket will not replace a farmer’s field, but it can be surprisingly generous. With good care, many home growers report a modest seed potato turning into a few kilos of usable tubers. Weather swings, poor drainage or late blight can cut that back, so expectations need to stay grounded.
There are also small risks to manage. Buckets can heat up quickly on sun-baked balconies, especially dark-coloured ones, stressing the roots. Lining the inside with a thin layer of cardboard or shading the outer surface helps keep temperatures down. Over time, salts from hard water or repeated fertiliser use can build up in the compost, so it pays to refresh or partially replace the mix every year.
Practical variations and related ideas
The same technique adapts easily to other containers: old paint tubs, food-grade barrels, even strong shopping bags with drainage holes. The principle stays the same – depth, drainage and gradually adding compost around the growing stems.
For households interested in learning along the way, a simple experiment can be revealing. Plant one bucket and never add extra compost after the first covering. Next to it, run a full hilling-up regime. Weighing the harvest from each bucket at the end of the season offers a clear, hands-on lesson in how stem coverage drives tuber production.
This style of growing also links well with other small-space projects, such as herbs in window boxes or salad leaves in shallow trays. Together, they form a compact, flexible food patch that can ride out rented homes, changing layouts and unpredictable weather, all anchored by the unassuming bucket quietly filling with potatoes beneath the surface.