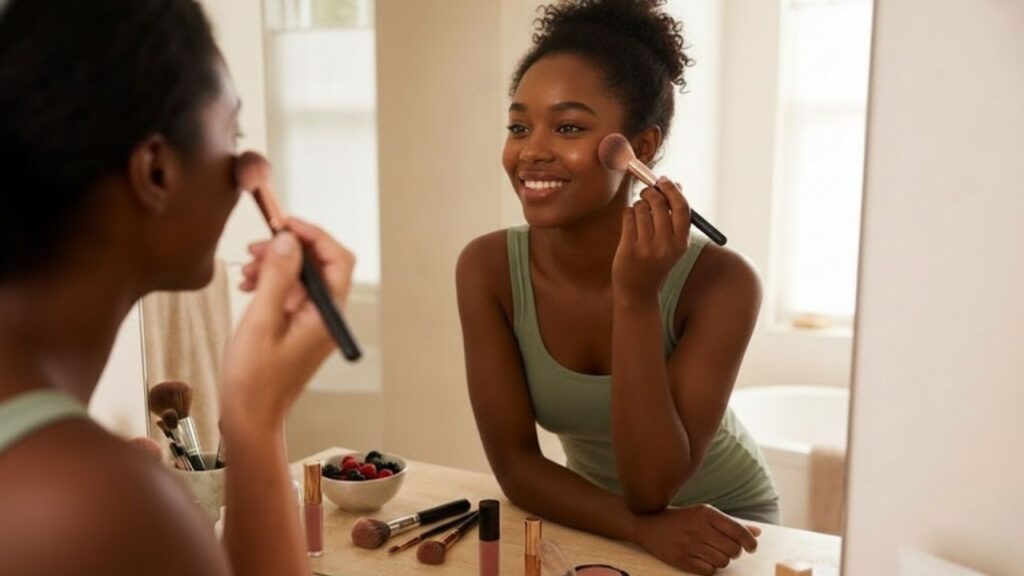
When looking in the bathroom mirror, a woman might notice that she looks almost the same as she did at 25, but something is subtly different. Her cheeks have slightly dropped, and the rounded areas that once lifted when she smiled now gently blend into her jawline. As she picks up her trusted blush brush and applies color to the apples of her cheeks, she stops midway. The color now makes her face appear droopy instead of lifted. The shadows under her eyes seem darker, and the center of her face looks slightly swollen. She tries again, this time applying it higher on her cheeks. Instantly, her cheekbones look more defined. Her face appears lifted, and her eyes look more awake. The product is the same. The change? Where the blush is applied.
Why Traditional Blush Placement Feels Wrong After 30
As time passes, there comes an age when your makeup routine no longer feels as effective. It’s not an obvious moment, but at some point, you realize things don’t look as right anymore, even when using the same techniques you’ve relied on for years. Blush tends to be the first issue. When applied too low and round, it can make a 32-year-old look tired by the afternoon. The color, which once brightened the apples of your cheeks, now falls closer to the lines around your nose and mouth, settling in those areas instead of adding dimension. That’s when it becomes more important to change where you place blush rather than which product you use. A makeup artist in London shared that she can often guess someone’s age simply by watching them apply blush. Younger individuals tend to apply it directly to the center of their cheeks, like a simple dot. However, people over 30 often continue using the same method, even as their faces have changed subtly over time. She shared a story about two sisters—one aged 28 and the other 38—who had similar skin tones and products. On the younger sister, blush applied to the apples of her cheeks enhanced her face, but on the older sister, it accentuated slight hollows under her eyes. When the artist moved the blush higher towards the temples on the older sister, it made her look like she’d had a restful night’s sleep. The color worked like a soft filter, drawing attention to her eyes and cheekbones instead of the center of her face. This transformation happens because, after 30, while your bone structure remains the same, the fat under your skin starts to shift. The round part of your cheek drops lower, and muscle memory causes you to smile where that roundness used to be. As a result, blush ends up applied in the area that’s starting to sag, making the face appear droopy. By shifting the blush higher, it creates the illusion of a lifted face without actually changing the structure. It’s not about altering features—it’s about redirecting where people look when they first see you.
The Modern Blush Placement That Lifts the Face Naturally
One simple makeup trick is taking over the beauty world right now, and it’s surprisingly effective. Instead of smiling and applying blush to the apples of your cheeks, keep your face relaxed and look straight ahead. Visualize a diagonal line running from the top of your ear to the side of your nostril. Apply blush along the upper half of this imaginary line, closer to your ear than your nose. The shape should resemble a soft, slanted “C” that curves toward the outer corner of your eye. Blend the color upwards toward your temples, not down toward the center of your cheek. Allow the color to fade gradually as it moves toward your hairline, like watercolor on paper. For most people over 30, this placement immediately highlights cheekbones that might have been overlooked. Additionally, leave a clean gap between the under-eye area and where the blush starts—about a finger-width of bare skin. This prevents the color from settling into fine lines or emphasizing dark circles. If you desire that fresh, flushed look, you can add a tiny bit of blush to the bridge of your nose, but keep the main color high on the outer face.

Blush Placement for a Healthy Glow Without Overdoing It
Many individuals over 30 often want a healthy glow but are concerned about looking too made up. This concern is valid because applying too much blush, especially too low on the cheek, can make you look unnaturally flushed. This is why where you place blush matters more than how much you apply. Start with less product than you think you need, tapping it on instead of sweeping it across your skin. Build the color gradually in thin layers instead of applying a thick stripe. Cream blushes often work better on mature skin, as they blend seamlessly into the skin rather than sitting on top. Let’s be realistic: no one spends 20 minutes applying makeup with professional brushes every day. On busy mornings, pick one simple rule to remember—like “higher and further back”—and forget the rest. The emotional impact is noticeable. On a tired day, the slightly higher blush placement makes your face appear more awake. It’s a small tweak that can make you feel like the version of yourself you still see on the inside.
 A €700,000 treasure: a Rhône resident finds gold bars and coins while digging a swimming pool
Key Tips to Remember
- Use an angled line instead of a circular shape when applying blush, creating an upward diagonal.
- Keep the strongest color away from your nose and mouth.
- Blend upwards into your temples to create a lifting effect.
- Choose cream or liquid formulas if powder blush settles into fine lines.
- Reevaluate your blush placement every few years because faces change and so should your routine.
Blush as a Confidence Reset with Age
There’s something subtly empowering about changing how you apply a product you’ve used for years. It’s like acknowledging that your face has shifted and choosing to work with that change rather than against it. The simple act of adjusting the angle of blush placement becomes a quiet negotiation with time. Many people discuss looking tired in front of bathroom mirrors, but it’s not the face that’s changed dramatically—it’s how light and shadow play across it. By adjusting where the color lands, you alter the way light hits your face. It’s almost philosophical, as the map you create with color shifts the story your face tells before you even speak. We’ve all had that moment of seeing a reflection and wondering, “Who is that?” While shifting blush placement doesn’t erase that shock, it can soften it. The right placement gently whispers that the person you feel like inside is still there, just highlighting the structure and expressions you’ve earned without dragging them down. This small change is easy to share, too. After trying the higher blush placement, it’s hard not to show a friend or family member. The contrast between the old method and the new is often more telling than any tutorial could be. Blush isn’t about copying trends—it’s about understanding the unique architecture of your face. Where does your face naturally want color, and where does it look more awake? There’s no universal formula, but the idea that color placed higher conveys youth and energy while color that pools in the center of the face suggests fatigue is a helpful guiding principle. That’s why this technique continues to surface on social feeds, even as contouring and highlighting trends come and go. It’s simple, requires no new products, and involves just shifting what you already have a few millimeters north.
| Astuce principale | Méthode recommandée | Bénéfice esthétique |
|---|---|---|
| Remonter la zone d’application | Déposer le blush au-dessus de l’axe oreille-nez, en direction des tempes | Donne un effet lift naturel au visage, sans chirurgie ni retouche |
| Préserver l’espace sous l’œil | Laisser environ un doigt de peau libre entre le correcteur et le blush | Atténue visuellement les cernes et limite l’accentuation des ridules |
| Favoriser les lignes obliques | Estomper le blush en diagonale plutôt qu’en cercle sur la joue | Affine les contours du visage et évite l’effet de traits alourdis après 30 ans |

